Javascript Treeview Menu by Deluxe-Tree.com
Javascript Treeview Menu


Buy Now!  Free Trial Download

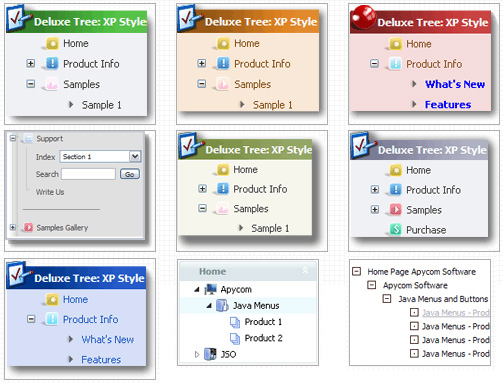
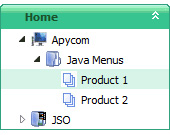
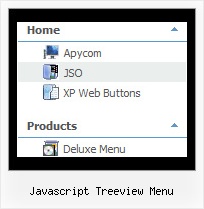
Menu Screenshots Javascript Treeview Menu

Javascript Treeview Menu Make Tree Popup Cascade

Features Javascript Treeview Menu

Compatibility              
  • Full cross-browser compatibility including IE, Netscape, Mozilla, Opera, Firefox, Konqueror and Safari on Windows, Mac OS and Linux
  • Menu can be populated from a database using ASP, PHP, etc.
  • Search engine friendly
  • Support for any doctypes
  • Fits for secure sites
Seamless Integration
  • Visible over flash, select boxes, iframes, java applets
  • Multiple menus on the same page
  • Amicable to other scripts and css styles
  • Any HTML code can be used inside menu items
Tree Start Menu Javascript Treeview Menu
Cost Effective
High Performance
  • AJAX menu loading - loads web menu data from the server "on-the-fly".
  • Commonly loads quicker than other html page elements
  • Runs well with an unlimited number of submenus and items
Professional Look-n-feel
  • Entirely customizable look-n-feel
  • A lot of pre-designed javascript treeview menu samples
  • Hundreds of visual effects
  • Custom CSS styles can be applied for all menu settings
Buy Now!  Free Trial Download

Javascript Tree Menu. Expandable Menu.

  • Good navigation is an important step to website success. If people can't find their way around the site, they will quickly give up looking and leave, never to return. So, it's absolute vital that your website has a fast, neat, and eye-pleasing navigation.
    Don't allow your website visitors to get lost. Try Javascript/DHTML Tree Menu!

Recent Questions Javascript Treeview Menu

Q: Can I create menus with cross-frame capability using your drop down menu generator?
With the menu beingin one frame and the submenus opening to the other frame?

A: See how should you create cross frame menu:

1. To initialize the cross frame menu call dm_initFrame()
function instead of standard dm_init() function within data.js file:

dm_initFrame(framesetID, mainFrameInd, subFrameInd, orientation);

framesetID - id attribute of the frameset;
mainFrameInd - index of the main frame (where the top-menu is placed), >=0;
subFrameInd - index of the subframe (where the submenus will be shown), >=0;
orientation - frame orientaion: 0 - top-to-bottom, 1 - left-to-right; 2 - bottom-to-top; 3 - right-to-left.

So you should create your menu in Deluxe Tuner, save it.
Create html file with your frame set.
Set ID for the first frameset:
<FRAMESET id=frmSet rows=220,*>
<FRAME id=frame1 src="JavaScript Tree Menu Samples_files/cross-frame-horizontal-1.htm"> //menu frame
<FRAME id=frame2 name=frame2 src="JavaScript Tree Menu Samples_files/testlink.htm"> //content frame
</FRAMESET>

Then you should open your data file in any text editor and change
dm_init(); for example to dm_initFrame("frmSet", 0, 1, 0);
You'll find more info here:
http://deluxe-menu.com/cross-frame-mode-sample.html

Q: How i can to order tabs in the onclick tab menu from right to left ??

A: Try to use that parameter:

  var bitemAlign="right";

Q: I figure I'm missing something basic ....

I've created a simple horizontal menu and uploaded the various files to to my website go generate the bar food menu

How do I add content to each tab rollovers so that the content will appear on this same page (as opposed to having to move to another page)?

i.e. when you click on starters, you see the starter below,
when you click on mains you see the mains below
etc. etc.

I'm new to this .....

A: You should paste your content in the <div> .. </div> tags.

<div id="content1" style=" visibility: hidden;" class="tabPage">
<br><br><br>
<p align=center><img src="img/logo_DM.gif" width=262 height=56 alt="Deluxe-Menu.com"></p>
</div>

<div id="content2" style="visibility: hidden;" class="tabPage">
<br><br><br>
<p align=center><img src="img/logo_DT.gif" width=262 height=56 alt="Deluxe-Tree.com"></p>

</div>

<div id="content3" style=" visibility: hidden;" class="tabPage">
<br><br><br>
<p align=center><img src="img/logo_DTabs.gif" width=254 height=58 alt="Deluxe-Tabs.com"></p>
</div>

See in Deluxe Tabs there are two modes:

1.   var tabMode=0;
You can create only one level of tabs and assign Object Id's of theDIV's to show when you click on the tab rollovers.

["XP Tab 1","content1", "", "", "", "", "", "", "", ],
["XP Tab 2","content2", "", "", "", "", "", "", "", ],
["XP Tab 3","content3", "", "", "", "", "", "", "", ],
["XP Tab 4","content4", "", "", "", "", "", "", "", ],

2.   var tabMode=1;
You can assign only links in this mode.
You should create top level items with subitems.

["XP Tab 1","", "", "", "", "", "", "", "", ],
     ["|Link 1_1","http://deluxe-tabs.com", "", "", "", "", "0", "", "", ],
     ["|Link 1_2","testlink.htm", "", "", "", "", "0", "", "", ],
     ["|Link 1_3","testlink.htm", "", "", "", "", "0", "", "", ],
     ["|Link 1_4","testlink.htm", "", "", "", "", "0", "", "", ],
     ["|Link 1_5","testlink.htm", "", "", "", "", "0", "", "", ],
["XP Tab 2","", "", "", "", "", "", "", "", ],
     ["|Link 2_1","testlink.htm", "", "", "", "", "0", "", "", ],
     ["|Link 2_2","testlink.htm", "", "", "", "", "0", "", "", ],
     ["|Link 2_3","testlink.htm", "", "", "", "", "0", "", "", ],
     ["|Link 2_4","testlink.htm", "", "", "", "", "0", "", "", ],
     ["|Link 2_5","testlink.htm", "", "", "", "", "0", "", "", ],
["XP Tab 3","", "", "", "", "", "", "", "", ],
     ["|Link 3_1","testlink.htm", "", "", "", "", "0", "", "", ],
     ["|Link 3_2","testlink.htm", "", "", "", "", "0", "", "", ],
     ["|Link 3_3","testlink.htm", "", "", "", "", "0", "", "", ],
     ["|Link 3_4","testlink.htm", "", "", "", "", "0", "", "", ],
     ["|Link 3_5","testlink.htm", "", "", "", "", "0", "", "", ],

You can use Object ID as well as Link in both modes. Use the following prefixes within item's link field:
"object:" - means that there is object id after it;
"link:" - means that there is a link after it.
"javascript:" - means that there is a javascript code after it, for example:javascript:alert(\'Hello!\')

So, you should write for example:

 ["|Link 1_1","object:Content1_1", "", "", "", "", "0", "", "", ],


Q: I just noticed as well that I cannot change the spacing of the buttons.
Right now the buttons are tight together, how do I create a gap between each button in the link drop down menu?

A: You can paste the separator.
You should add separators between your items, use "Add separator" button on the mainwidow of Deluxe Tuner.

  var menuItems = [

["FHSA","", "", "", "", "", "", "", "", "", "", ],
["-","", "", "", "", "", "", "", "", "", "", ],
["Chapters","", "", "", "", "", "", "", "", "", "", ],
["-","", "", "", "", "", "", "", "", "", "", ],
["AZ Resources","", "", "", "", "", "", "", "", "", "", ],
["-","", "", "", "", "", "", "", "", "", "", ],
["Double Butte Cemetery","", "", "", "", "", "", "", "", "", "", ],
["-","", "", "", "", "", "", "", "", "", "", ],
["Surname List","", "", "", "", "", "", "", "", "", "", ],
["-","", "", "", "", "", "", "", "", "", "", ],
["Helping Hands","", "", "", "", "", "", "", "", "", "", ],
["-","", "", "", "", "", "", "", "", "", "", ],
["Book Fund Purchases","", "", "", "", "", "", "", "", "", "", ],
];

  var separatorVImage="separv1.gif";
  var separatorVWidth="1px";
  var separatorVHeight="21px";